It is vital to learn how to increase RAM on Android tablet and phone especially when you feel your Android device is running slower than usual, lagging, or crashing without reason. Basically, there are two ways to increase RAM (Random Access Memory) on an Android device: one method is without root and the other is with root. Both methods are extremely easy to learn and it doesn’t require any advanced computing knowledge. Anyone can do it for free with the guide below.
How to Increase RAM on Android without Root
RAM is a physical hardware therefore it is almost impossible to add more RAM into your Android phone or tablet. However, you can increase RAM virtually on Android using some of the proven techniques here without rooting the device. These methods tend to be easier as it doesn’t require you to root your Android device. See also: How to Install Cracked Apps on Android without Root
1. Uninstall Unused Apps
To increase RAM on Android, the first thing to do is to uninstall unused apps. This is because some apps use RAM even they are not being used. By removing 5 to 10 unused apps from your Android device, it will definitely increase the RAM.
2. Disable Applications
Disabling applications is another great way to speed up your Android phone or tablet. Go to Settings -> Apps (or Application Manager) -> All tab. Tap on the app you no longer want to use and tap Disable -> Confirm. Alternatively, you can tap Force stop if the app is crashed.
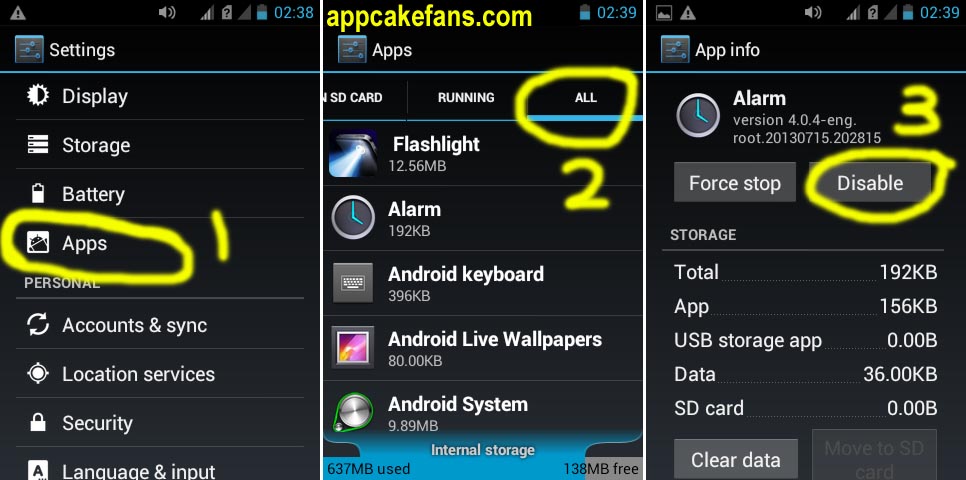
3 Steps to increase RAM on Android by disabling applications
3. Don’t use live wallpapers or animations
Live wallpapers, animations and similar widgets will slow down your device because they are the thing that uses a lot of RAM. Other than that, using live wallpapers on your Android also resulting battery to drain quicker than usual. See also: How to set wallpaper without cropping in Android.
How to Increase RAM on Android with Root
Once an Android is rooted, there are endless possibility. This includes increasing RAM on the device. There are many apps available in the market with the purpose to increase RAM on Android devices. In other words, these apps are built to speed up, to give more space, and to avoid lagging on Android devices. Here are the top 7 apps that you should consider if you are looking for a way to increase RAM on Android with root.
- ROEHSOFT RAM Expander (See below for step by step guide) – $9.99
- Smart RAM Booster – Free
- Memory Booster – Free
- Swapper for Root – Free
- Clean Master – Free
- Du Speed Booster – Free
- FMR Memory Cleaner – Free
How to Increase RAM on Android using ROEHSOFT RAM Expander
ROEHSOFT RAM Expander is one of the most popular ways to increase the available RAM on Android. This app is available for $9.99 and it works only on rooted Android phones and tablets. ROEHSOFT RAM Expander (SWAP) is an app that is able to create partition on your SD card. It works like how you create partition on a hardisk in Windows and Mac. At a minimum, a class 4 SD card is required. Follow the steps here to learn how to increase RAM on Android using ROEHSOFT RAM Expander.
Step 1: Check if your Android phone or tablet is compatible for ROEHSOFT RAM Expander. To do so, download MemoryInfo & Swapfile Check app. Run the app, go to Start Ramexpander Test Here -> select SD-card -> Click for result. Your Android is compatible if you see Congratulations, otherwise, it is not.
Step 2: Download ROEHSOFT RAM Expander from Google Play or any third-party Android market such as Blackmart, AppRob, AppChina, Snappzmarket, Aptoide, Gfan, AppBrain, Hiapphere, and Wandoujia. Normally you can download ROEHSOFT RAM Expander APK from these third-party Android market for free.
Step 3: Install ROEHSOFT RAM Expander once you have downloaded the APK. Give the app root permission and select your prefered language.
Step 4: Now you can set the amount of space you want on your SD card to allocate to SWAP partition. Give it the right value and your Android will run faster than before. Tap Swap Activ to complete the setting.
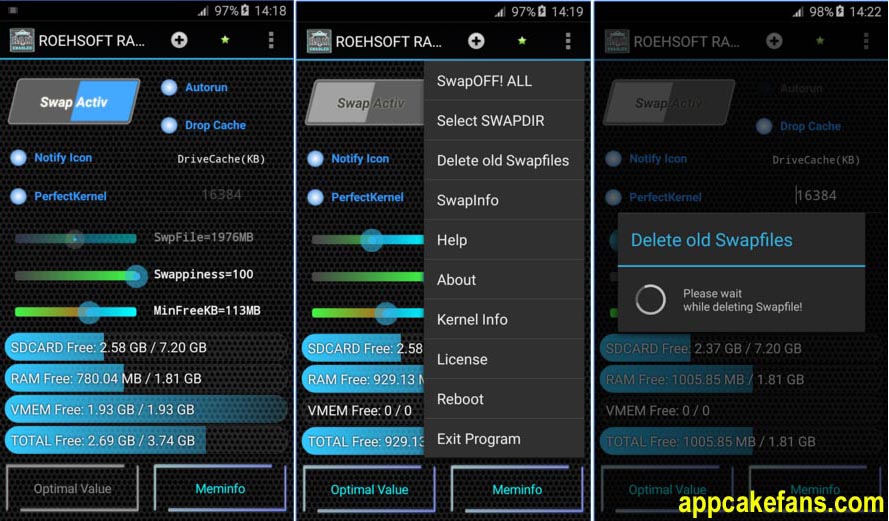
ROEHSOFT RAM Expander is a great method to increase RAM on Android using the available space in SD card. Thus, the bigger available space, the better it performs.
